

What is Gardening?
Definition
Gardening is the practice of growing and cultivating plants as part of horticulture. It involves the selection, planting, nurturing, and maintaining of various types of plants, such as flowers, herbs, vegetables, fruits, and ornamental plants. Gardening can be done for various purposes, including aesthetic enjoyment, food production, environmental enhancement, and therapeutic benefits.
Scope
Gardening is a versatile and inclusive activity that can be tailored to fit any space, lifestyle, and level of expertise. The scope of gardening is vast, encompassing a wide range of practices and garden types:
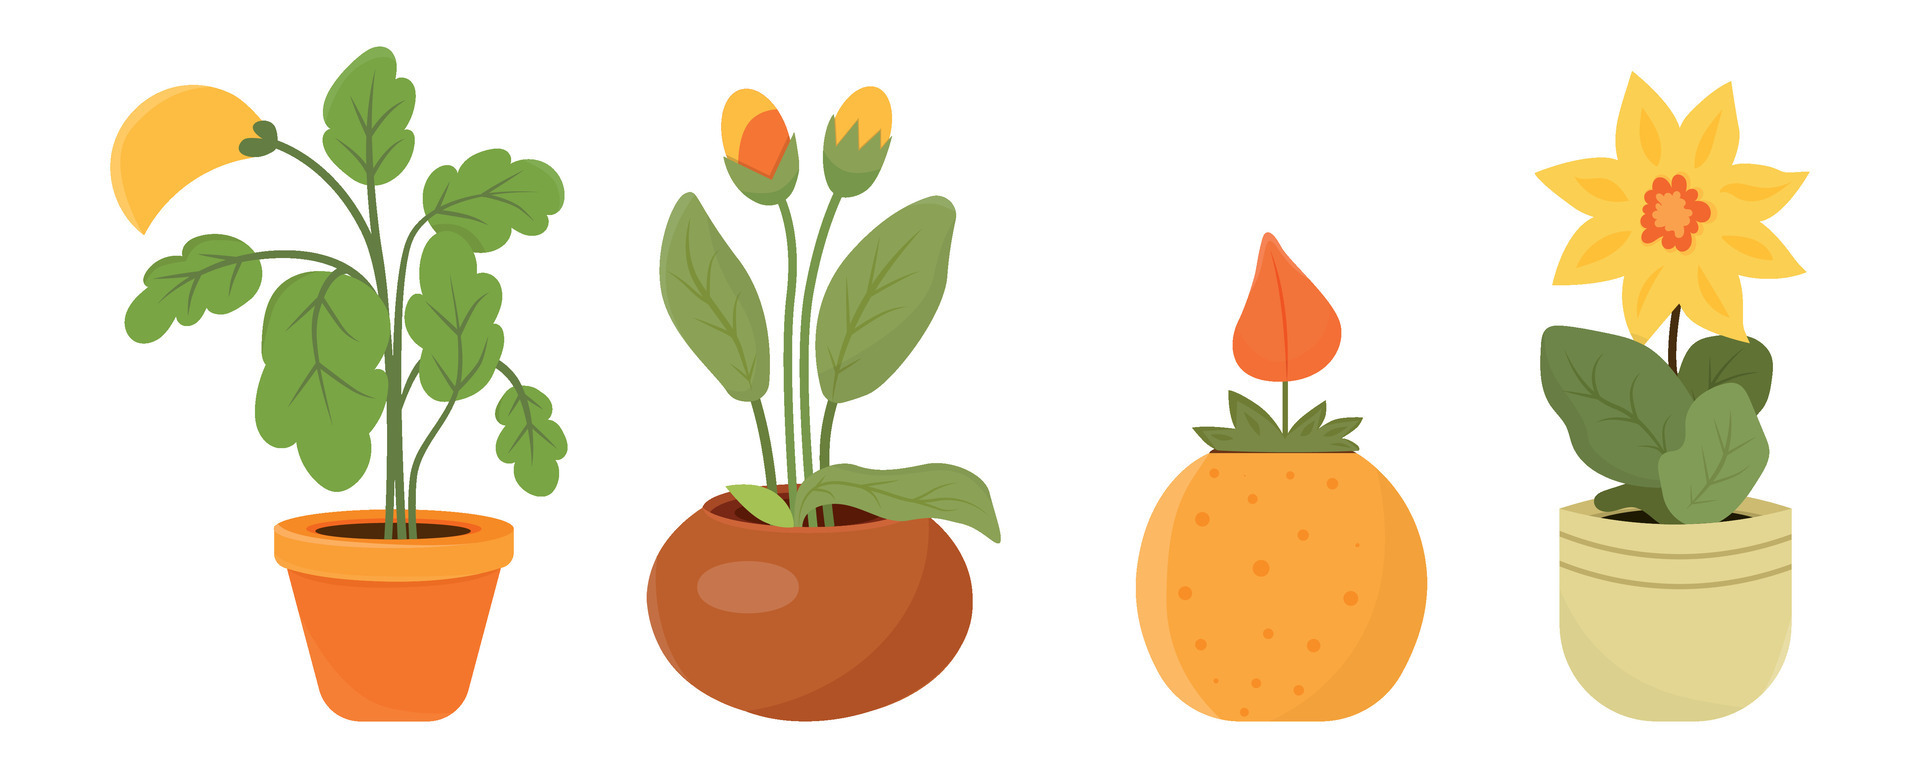
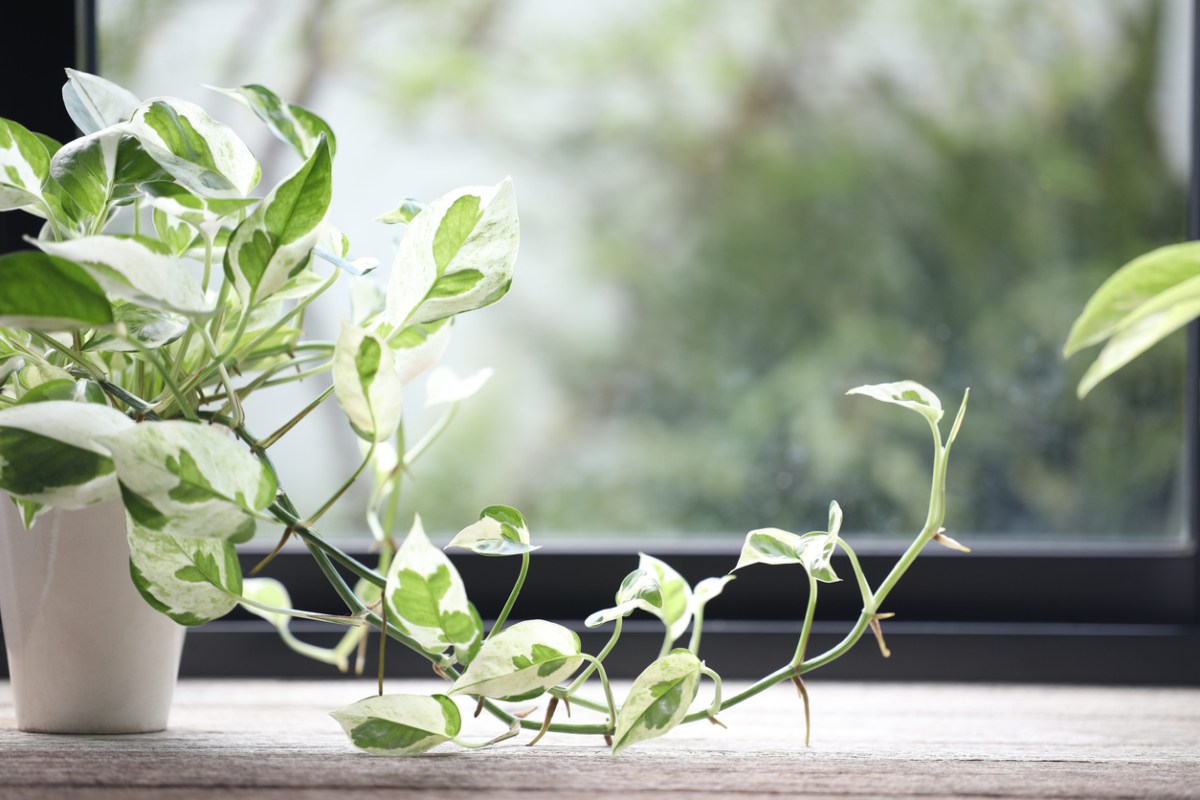
- Houseplants: Indoor gardening with potted plants that thrive in controlled environments, enhancing interior spaces with greenery and improving indoor air quality.
- Balcony Gardens: Utilizing limited outdoor spaces like balconies or terraces to grow plants in containers, hanging baskets, and vertical planters.
- Rooftop Gardens: Transforming rooftop spaces into productive and aesthetically pleasing gardens, often incorporating sustainable practices such as rainwater harvesting and composting.
- Backyard Gardens: Traditional outdoor gardens in residential yards, where a variety of plants can be grown, from vegetables and herbs to ornamental flowers and shrubs.
- Community Gardens: Shared gardening spaces in urban or suburban areas, where individuals or groups can cultivate plants together, fostering a sense of community and shared responsibility.
- Vertical Gardens: Innovative gardening techniques that involve growing plants on vertical surfaces, such as walls or trellises, maximizing space in urban environments.
- Kitchen Gardens: Small-scale gardens focused on growing culinary herbs, vegetables, and fruits, often located near the kitchen for easy access to fresh ingredients.
- Container Gardens: Growing plants in pots, tubs, or other containers, making gardening accessible for those with limited space or mobility.
- Hydroponic Gardens: Soilless gardening systems that use nutrient-rich water solutions to grow plants, suitable for both indoor and outdoor environments.
- Permaculture Gardens: Sustainable and self-sufficient gardening practices that mimic natural ecosystems, emphasizing biodiversity, soil health, and resource conservation.
Gardening can be as simple as caring for a single potted plant or as complex as managing a large, diversified garden. It offers a flexible and rewarding way to engage with nature, providing opportunities for creativity, learning, and personal growth. Whether you are a novice gardener with a small indoor setup or an experienced horticulturist with an expansive outdoor garden, the possibilities in gardening are endless.

Types of Personal Gardens
Gardening is a versatile activity that can be adapted to fit any living situation or personal preference. Here are several types of personal gardens, each offering unique opportunities and benefits:
Rooftop Gardens
Rooftop gardens utilize the often-overlooked space on building roofs, transforming them into lush, green areas. These gardens can be as simple as a few potted plants or as complex as a fully landscaped garden. Benefits include:
- Urban Greening: Reducing the urban heat island effect.
- Insulation: Improving building insulation, reducing heating and cooling costs.
- Aesthetic Appeal: Enhancing the visual appeal of urban environments.
- Food Production: Growing fresh produce in urban areas.
Balcony Gardens
Balcony gardens make use of limited outdoor space, perfect for apartment dwellers. These gardens can feature potted plants, hanging baskets, and vertical planters. Benefits include:
- Maximizing Space: Utilizing small areas efficiently.
- Easy Access: Convenient for daily care and maintenance.
- Versatility: Suitable for a variety of plants, including flowers, herbs, and vegetables.
Potted Plant Gardens
Potted plant gardens are versatile and can be placed anywhere, indoors or outdoors. They are ideal for beginners and those with limited space. Benefits include:
- Mobility: Easy to move and rearrange.
- Control: Better control over soil quality and plant conditions.
- Decoration: Enhancing indoor and outdoor spaces with aesthetic arrangements.
Backyard Spice Patches
Backyard spice patches are small garden areas dedicated to growing culinary herbs and spices. These gardens can be planted directly in the ground or in raised beds. Benefits include:
- Fresh Ingredients: Easy access to fresh, aromatic herbs for cooking.
- Cost Savings: Reducing grocery bills by growing your own herbs.
- Health Benefits: Adding fresh, nutrient-rich herbs to your diet.
Kitchen Gardens
Kitchen gardens focus on growing a variety of vegetables, fruits, and herbs that can be used in daily cooking. These gardens can be located in backyards, on patios, or even indoors. Benefits include:
- Convenience: Fresh ingredients at your fingertips.
- Nutrition: Access to healthy, home-grown produce.
- Sustainability: Reducing reliance on store-bought produce.
Vertical Gardens
Vertical gardens use structures such as trellises, walls, or specially designed planters to grow plants upwards rather than outwards. These gardens are ideal for small spaces. Benefits include:
- Space Efficiency: Maximizing growing space in compact areas.
- Aesthetic Appeal: Creating green walls and beautiful vertical displays.
- Variety: Suitable for a wide range of plants, from climbers to herbs.
Community Gardens
Community gardens are shared spaces where individuals or groups come together to grow plants. These gardens foster a sense of community and provide access to gardening for those without personal space. Benefits include:
- Social Interaction: Building relationships with neighbors and community members.
- Learning Opportunities: Sharing knowledge and gardening tips.
- Resource Sharing: Pooling resources and tools for cost-effective gardening.
How to Get Involved:
- Local Organizations: Contact local gardening clubs, community centers, or environmental organizations.
- Online Platforms: Use social media and community forums to find local gardening groups.
- Volunteering: Volunteer at existing community gardens to learn and contribute.
- Starting Your Own: Collaborate with neighbors to start a new community garden in your area.
Indoor Gardens
Indoor gardens allow you to grow plants inside your home, using pots, hydroponic systems, or grow lights. These gardens are perfect for those with no outdoor space. Benefits include:
- Year-Round Gardening: Growing plants regardless of outdoor weather conditions.
- Air Quality: Improving indoor air quality with greenery.
- Accessibility: Easy to manage and maintain within the home environment.
Use of Grow Lights and Indoor Setups:
- Grow Lights: Provide the necessary light spectrum for plant growth when natural sunlight is insufficient.
- Hydroponic Systems: Grow plants without soil, using nutrient-rich water solutions.
- Plant Stands and Shelves: Organize plants in well-lit areas to maximize space and light exposure.
Each type of personal garden offers unique advantages and opportunities, making gardening accessible to everyone, regardless of their living situation or experience level. By choosing the type of garden that best fits your lifestyle and space, you can enjoy the numerous benefits of gardening in a way that works for you.

History of Gardening Across the World
Gardening has a rich and varied history that reflects the evolution of human civilization and culture. From ancient times to the modern era, gardens have served as places of beauty, sustenance, and innovation. Here is an overview of the history of gardening across the world:
Ancient Gardens
Gardens have been an integral part of human societies since ancient times, serving as both practical and decorative spaces.
- Mesopotamian Gardens:
- Hanging Gardens of Babylon: One of the Seven Wonders of the Ancient World, these gardens were renowned for their terraced layout and intricate irrigation systems. Though their exact existence and location are debated, they symbolize the advanced horticultural practices of the time.
- Purpose: These gardens were used for aesthetic pleasure, showcasing the power and wealth of the ruling class.
- Egyptian Gardens:
- Formal Layouts: Egyptian gardens were characterized by their symmetrical designs and formal layouts. They often included walled enclosures with geometric patterns.
- Uses: Gardens served both practical and ceremonial purposes, with fruit trees, vegetables, and ornamental plants. They were integral to temples, palaces, and private homes.
- Irrigation: Advanced irrigation techniques, including canals and shadufs (manual water-lifting devices), allowed for lush gardens in the arid climate.
- Roman Gardens:
- Villa Gardens: Wealthy Romans created elaborate gardens in their villas, featuring fountains, statues, and topiary. These gardens were places for relaxation, entertainment, and displaying wealth.
- Hortus: The Roman hortus (kitchen garden) was a staple in many households, providing fresh produce and herbs.
- Public Gardens: Romans also developed public gardens and parks, known as horti, which were accessible to the public and used for recreation and social gatherings.
Medieval Gardens
The medieval period saw the evolution of gardening techniques and the establishment of gardens as centers of learning and spirituality.
- Monastic Gardens:
- Purpose: Monasteries maintained gardens for practical purposes, such as growing medicinal herbs, vegetables, and fruits. They also served as places for meditation and reflection.
- Design: Monastic gardens often featured cloister gardens, enclosed by the monastery walls, with a central fountain or well symbolizing the source of life.
- Horticultural Knowledge: Monks preserved and advanced horticultural knowledge through their writings and practices, contributing significantly to the development of gardening techniques.
- Evolution of Gardening Techniques:
- Medieval Europe: Gardening techniques improved with the introduction of new plant varieties, crop rotation, and soil enrichment methods.
- Herb Gardens: The cultivation of herbs for medicinal, culinary, and aromatic purposes became more sophisticated, with detailed herbals (manuals) documenting plant uses and growing methods.
Modern Gardening
The modern era of gardening is marked by technological advancements, aesthetic innovations, and the democratization of gardening practices.
- Victorian Glasshouses:
- Greenhouses: The Victorian era saw the development of greenhouses and conservatories, allowing for the cultivation of exotic plants and flowers. These structures became symbols of status and scientific curiosity.
- Ornamental Gardening: This period emphasized ornamental gardening, with elaborate flower beds, manicured lawns, and intricate designs. Public parks and botanical gardens flourished, showcasing plant diversity and horticultural expertise.
- Urban Gardening Trends:
- 20th Century: The 20th century brought about significant changes in gardening, including the rise of suburban gardens, community gardens, and the environmental movement.
- Victory Gardens: During both World Wars, victory gardens were promoted to supplement food supplies, demonstrating the practical importance of gardening.
- Organic Gardening: The latter half of the century saw a growing interest in organic gardening, sustainability, and ecological awareness.
- 21st Century Innovations:
- Urban Gardening: Today, urban gardening trends such as rooftop gardens, vertical gardens, and hydroponics address the challenges of space and sustainability in densely populated areas.
- Technology: Advances in gardening technology, including smart irrigation systems, indoor grow lights, and plant monitoring apps, have made gardening more accessible and efficient.
- Community Involvement: Community gardens and urban farming initiatives have revitalized gardening as a communal activity, promoting local food production and green spaces in cities.
From the ancient Hanging Gardens of Babylon to modern urban gardening innovations, the history of gardening reflects humanity’s ongoing relationship with nature, creativity, and sustainability. This rich heritage continues to inspire gardeners today, offering a wealth of knowledge and tradition to draw upon as we cultivate our own green spaces.

Why Garden?
Gardening offers a multitude of benefits that extend far beyond the simple act of planting seeds and nurturing plants. Whether you have a sprawling backyard or a small balcony, gardening can positively impact various aspects of your life. Here are some compelling reasons to start gardening:
Relaxation
Gardening is an excellent way to unwind and de-stress. The repetitive tasks of planting, watering, and weeding can be meditative, allowing you to focus on the present moment and clear your mind of daily worries.
- Stress Relief: Engaging with nature and spending time outdoors has been shown to lower cortisol levels, reducing stress.
- Mindfulness: Gardening encourages mindfulness, a practice that promotes being fully present and engaged with your surroundings.
Connection to Nature
In our increasingly urbanized world, gardening provides a vital connection to nature. It allows you to observe the changing seasons, witness the growth cycle of plants, and appreciate the beauty of the natural world.
- Environmental Awareness: Gardening fosters a greater understanding of environmental issues, such as biodiversity, climate change, and sustainable practices.
- Ecosystem Engagement: By creating a garden, you contribute to local ecosystems, providing habitats for pollinators, birds, and other wildlife.
Mental Health
Gardening has significant benefits for mental health, offering therapeutic effects that can improve overall well-being.
- Improving Mood: Regular interaction with plants and soil has been linked to increased serotonin levels, which can enhance mood and reduce feelings of depression and anxiety.
- Cognitive Function: Gardening activities stimulate the brain, improving cognitive function and potentially reducing the risk of cognitive decline in older adults.
Physical Health
Gardening involves various physical activities that contribute to overall health and fitness.
- Light Exercise: Tasks such as digging, planting, and weeding provide moderate physical exercise, helping to improve strength, stamina, and flexibility.
- Fresh Air: Spending time outdoors in the garden increases exposure to fresh air and sunlight, boosting vitamin D levels and enhancing respiratory health.
Sustainability
Gardening promotes sustainable living by encouraging practices that reduce environmental impact.
- Growing Your Own Food: By growing your own fruits, vegetables, and herbs, you can reduce your reliance on store-bought produce, cutting down on transportation emissions and packaging waste.
- Composting: Composting kitchen and garden waste reduces landfill use and produces nutrient-rich soil, promoting a circular economy.
Educational Aspect
Gardening is an ongoing learning experience that can deepen your knowledge of the natural world.
- Plant Biology: Understanding the biology of plants, from seed germination to photosynthesis, provides insight into fundamental life processes.
- Ecosystems and Sustainability: Learning about the interactions between plants, insects, and soil organisms enhances your awareness of ecosystems and the importance of sustainable practices.
Economic Benefits
Gardening can also have financial advantages, helping you save money on groceries and gardening supplies.
- Saving Money: Growing your own herbs, vegetables, and fruits can reduce grocery bills, providing fresh, organic produce at a fraction of the cost.
- DIY Projects: Creating your own compost, fertilizers, and garden structures can save money and reduce the need for store-bought products.
Gardening is a multifaceted activity that offers relaxation, connection to nature, mental and physical health benefits, sustainability, educational opportunities, and economic savings. Whether you are a novice or an experienced gardener, the act of cultivating a garden can enrich your life in numerous ways. By starting your own garden, you embark on a journey of personal growth, environmental stewardship, and holistic well-being.

Basics of Agro-Therapy and General Health
Agro-therapy, also known as horticultural therapy, integrates gardening and plant cultivation into therapeutic practices, offering numerous benefits for physical, mental, and emotional well-being. Here’s a detailed look at the basics of agro-therapy and its connection to general health:
Definition and Benefits of Agro-Therapy
Agro-therapy involves using gardening and plant-related activities as a form of therapeutic intervention to improve various aspects of health. It harnesses the natural processes of gardening to promote healing, relaxation, and personal growth.
Benefits of Agro-Therapy:
- Mental Health: Gardening activities can reduce stress, anxiety, and depression. The act of nurturing plants provides a sense of accomplishment and purpose.
- Emotional Well-being: Engaging with nature through gardening can improve mood and emotional resilience, offering a form of emotional release and solace.
- Physical Health: Gardening promotes physical activity, which helps in improving strength, flexibility, and overall fitness. Activities such as digging, planting, and weeding contribute to cardiovascular health and muscle toning.
- Social Interaction: Participating in community gardens or group gardening activities fosters social connections, reducing feelings of loneliness and isolation.
- Cognitive Function: Gardening stimulates mental activity, enhancing cognitive function and memory. It involves problem-solving, planning, and learning about plant care, which can be particularly beneficial for older adults.
General Health Benefits
Gardening not only provides therapeutic advantages but also contributes to general health through improved nutrition and lifestyle.
- Improved Nutrition: Growing your own fruits, vegetables, and herbs ensures access to fresh, nutrient-rich produce. Home-grown produce often contains higher levels of vitamins, minerals, and antioxidants compared to store-bought items.
- Better Quality: You have control over how your food is grown, including avoiding pesticides and chemicals.
- Variety: Home gardens allow you to cultivate a wide variety of vegetables, fruits, and herbs, promoting a diverse and balanced diet.
- Healthy Lifestyle: Regular gardening activities incorporate physical exercise into your daily routine, supporting cardiovascular health and weight management.
- Outdoor Activity: Gardening encourages spending time outdoors, increasing exposure to fresh air and sunlight, which is beneficial for mental and physical health.
- Stress Reduction: The calming effects of gardening help manage stress levels, leading to better overall health and well-being.
Case Studies: Examples of Agro-Therapy in Practice
- The Eden Alternative: This program focuses on using gardens to improve the quality of life for elderly individuals in nursing homes. It emphasizes the therapeutic benefits of engaging with plants and animals to combat loneliness and enhance overall well-being.
- Impact: Residents report increased happiness, improved mood, and enhanced social interactions as a result of participating in gardening activities.
- The Garden Project: This community-based initiative provides gardening opportunities for at-risk youth and individuals facing mental health challenges. Participants engage in hands-on gardening activities to develop skills, build self-esteem, and improve mental health.
- Impact: Participants show significant improvements in mood, social skills, and personal confidence.
- Green Care Farms: In various countries, green care farms use agro-therapy to support individuals with mental health issues, disabilities, and social challenges. These farms offer structured gardening activities as part of a comprehensive therapeutic program.
- Impact: Individuals experience reduced anxiety, increased social integration, and improved self-care abilities.
Programs and Resources
Several programs and resources are available for those interested in agro-therapy, whether for personal use or professional practice.
- Horticultural Therapy Programs:
- American Horticultural Therapy Association (AHTA): Provides certification, resources, and information about horticultural therapy practices and programs.
- The Royal Horticultural Society (RHS): Offers resources and training on gardening for health and well-being.
- Community Gardens and Urban Farms:
- Local Community Gardens: Many cities have community gardens that offer opportunities for therapeutic gardening and social engagement.
- Urban Farming Initiatives: Programs that integrate gardening into urban environments often include therapeutic aspects, providing access to gardening for various populations.
- Non-Profit Organizations:
- Garden Therapy Programs: Organizations such as the National Garden Bureau and local non-profits may offer information on therapeutic gardening programs and workshops.
- Educational Resources:
- Books and Publications: Various books and journals provide insights into horticultural therapy and its applications.
- Online Courses: Platforms like Coursera and Udemy offer courses on horticultural therapy and gardening for health.
Getting Involved:
- Volunteer: Engage with local community gardens or therapeutic gardening programs.
- Join a Workshop: Participate in workshops or classes focused on gardening for health and well-being.
- Start a Garden: Begin your own gardening journey and explore the therapeutic benefits of nurturing plants.
Agro-therapy offers a holistic approach to health and well-being, leveraging the therapeutic benefits of gardening to support mental, emotional, and physical health. By participating in agro-therapy programs or incorporating gardening into your life, you can experience improved nutrition, relaxation, and a deeper connection to nature. Whether through personal or community gardening initiatives, the practice of agro-therapy provides valuable opportunities for growth, healing, and well-being.
Preparing Pots for Planting
Selecting and preparing the right pots is crucial for successful gardening, whether you’re growing herbs on a windowsill or vegetables on a balcony. Proper preparation ensures that plants have the best possible environment to thrive. Here’s a detailed guide to help you prepare pots for planting:
Choosing the Right Pots
- Size:
- Consider Plant Size: Choose a pot size based on the mature size of the plant. Larger pots are generally better for plants with extensive root systems, while smaller pots are suitable for herbs or small flowers.
- Growth Space: Ensure the pot provides enough space for roots to expand. Too small a pot can restrict growth, while too large a pot can lead to waterlogging.
- Material:
- Plastic Pots: Lightweight and inexpensive, plastic pots retain moisture well and are suitable for a wide range of plants. They are also less likely to break or crack.
- Terracotta Pots: Made from clay, these pots are porous and allow for good air circulation but may dry out quickly. They are ideal for plants that prefer drier conditions.
- Ceramic Pots: Often glazed, ceramic pots come in various designs and colors. They retain moisture well but can be heavy and prone to cracking in freezing temperatures.
- Metal Pots: While durable and stylish, metal pots can heat up quickly, potentially harming plant roots. Ensure they have adequate drainage.
- Drainage Considerations:
- Drainage Holes: Pots should have drainage holes to prevent waterlogging and root rot. If a pot lacks holes, you can drill them yourself or choose another pot.
- Saucers: Use saucers underneath pots to catch excess water and protect surfaces from damage.
Steps to Prepare Pots
- Cleaning:
- Initial Clean: Before planting, thoroughly clean pots to remove any residue, dirt, or pathogens. Use warm, soapy water and a brush to scrub the interior and exterior.
- Sterilization: For used pots, consider sterilizing them to prevent the spread of diseases. Soak in a solution of one part bleach to nine parts water for 10-15 minutes, then rinse thoroughly and let dry.
- Adding Drainage Layers:
- Gravel or Pebbles: Place a layer of gravel or small pebbles at the bottom of the pot to facilitate drainage and prevent soil from blocking the drainage holes.
- Landscape Fabric: Alternatively, use landscape fabric or coffee filters over the drainage holes to keep soil in while allowing water to escape.
- Filling with Substrate:
- Potting Mix: Fill the pot with a high-quality potting mix designed for container gardening. Potting mix is lighter and drains better than garden soil.
- Soil Mixes: For specific plants, use specialized soil mixes. For example, cactus soil for succulents or a peat-based mix for acid-loving plants.
Recycled Containers: Creative Ideas for Using Recycled Materials as Pots
- Plastic Bottles:
- Simple Planters: Cut plastic bottles in half to create small planters. Drill drainage holes in the bottom and use them for herbs or small flowers.
- Self-Watering Planters: Create a self-watering system by placing a smaller bottle inside a larger one, with the smaller one’s neck extending out to serve as a reservoir.
- Tin Cans:
- Decorative Pots: Use empty tin cans as pots for small plants. Paint or decorate them to match your garden aesthetics.
- Drainage: Punch holes in the bottom of the cans for drainage and add a layer of gravel or small stones before filling with soil.
- Wooden Crates:
- Rustic Planters: Wooden crates or boxes make excellent rustic planters. Line the bottom with landscape fabric to keep soil in and protect the wood from moisture.
- Stacked Crates: Stack several crates to create a vertical garden or tiered planter system.
- Old Teacups and Mugs:
- Charming Containers: Use old teacups and mugs as charming planters for succulents or small flowers. Ensure they have drainage holes or use a small layer of gravel to prevent waterlogging.
- Rubber Boots:
- Quirky Planters: Old rubber boots can be repurposed into quirky planters. Drill drainage holes in the bottom and fill with soil for a fun, unique garden display.
- Wooden Pallets:
- Vertical Gardens: Repurpose wooden pallets into vertical garden frames. Attach plastic liners or small pots to the pallet and fill with soil for a space-saving garden solution.
Preparing pots for planting involves selecting the right size and material, ensuring proper drainage, and considering creative ways to repurpose recycled containers. By following these guidelines, you can create a thriving environment for your plants, whether you’re using traditional pots or innovative recycled materials. This preparation sets the foundation for a successful gardening experience, allowing your plants to grow and flourish in a well-suited home.

Different Growing Substrates
Choosing the right growing substrate is crucial for the health and productivity of your plants. Each substrate has unique properties and benefits that can affect plant growth. Here’s a detailed overview of various growing substrates:
Coco Peat
Benefits:
- Water Retention: Coco peat, also known as coir, retains moisture well, reducing the need for frequent watering. It helps maintain a consistent level of moisture in the soil.
- Aeration: It provides excellent aeration for plant roots, preventing compaction and promoting healthy root development.
- pH Balance: Coco peat has a neutral pH, making it suitable for a wide range of plants. It can also be blended with other substrates to adjust pH levels.
- Sustainability: Made from the husks of coconuts, it is a renewable resource and an eco-friendly alternative to peat moss.
Uses:
- Potting Mix: Ideal for use in potting mixes for indoor and outdoor plants. Often mixed with perlite or vermiculite for improved drainage.
- Seed Starting: Excellent for starting seeds due to its fine texture and moisture-retentive properties.
- Soil Amendment: Can be added to garden soil to improve water retention and aeration.
Soil
Types of Soil:
- Loamy Soil: A balanced mixture of sand, silt, and clay. It has good drainage and nutrient-holding capacity, making it ideal for most plants.
- Properties: Fertile, well-draining, and easy to work with. Holds moisture without becoming waterlogged.
- Clay Soil: Contains fine particles that compact tightly. It retains moisture but can become heavy and poorly draining.
- Properties: High nutrient content but slow drainage. Amend with organic matter to improve texture and drainage.
- Sandy Soil: Has larger particles and drains quickly. It warms up faster but may require more frequent watering and fertilization.
- Properties: Well-draining but low in nutrients. Often enriched with organic matter to improve fertility and moisture retention.
- Silty Soil: Smooth and holds moisture better than sandy soil but can become compacted.
- Properties: Fertile and retains moisture well but may need improvement for drainage.
Uses:
- Garden Beds: Ideal for outdoor garden beds, especially when properly amended to suit plant needs.
- Potting Mix: Often mixed with other substrates for container gardening to ensure good drainage and aeration.
Sand
Benefits:
- Improved Drainage: Sand is used to enhance drainage in heavy or clayey soils. It helps prevent waterlogging and root rot.
- Aeration: Adds space to the soil, improving air circulation around plant roots.
Uses:
- Soil Amendment: Mix with clay or loamy soil to improve drainage and prevent compaction.
- Potting Mixes: Can be added to potting mixes to improve drainage for plants that prefer drier conditions.
Charcoal
Benefits:
- Soil Conditioner: Charcoal (particularly activated charcoal) helps improve soil structure by enhancing aeration and reducing acidity.
- Odor Control: It absorbs odors and toxins, creating a healthier growing environment.
- Nutrient Retention: Charcoal helps retain nutrients in the soil, making them more available to plants.
Uses:
- Soil Amendment: Mixed into garden soil or potting mixes to improve texture and nutrient availability.
- Composting: Added to compost piles to help with odor control and nutrient balance.
Hydrogel
Benefits:
- Water Retention: Hydrogel crystals absorb and hold large amounts of water, releasing it gradually to plant roots. This reduces the need for frequent watering.
- Soil Moisture Management: Helps maintain consistent moisture levels in the soil, which is especially useful for plants that are sensitive to water fluctuations.
- Ease of Use: Simple to incorporate into existing soil or potting mixes.
Uses:
- Potting Mixes: Added to potting mixes for container gardening to reduce watering frequency.
- Garden Beds: Mixed into garden soil to improve water retention, particularly in arid regions or during dry spells.
Understanding the properties and benefits of different growing substrates allows you to tailor your gardening practices to suit various plants and conditions. Whether using coco peat for moisture retention, sand for improved drainage, or hydrogel for consistent soil moisture, each substrate has unique advantages that can enhance plant growth and health. By selecting and preparing the right substrates, you set the foundation for a thriving garden and successful plant cultivation.

Self-Watering Pots
Self-watering pots are an innovative solution for maintaining optimal moisture levels in your plants with minimal effort. They help ensure that your plants receive a consistent supply of water, making them ideal for busy gardeners or those who want to reduce their watering chores. Here’s a comprehensive guide to self-watering pots, including commercial options, DIY methods, and a comparison of different systems.
Commercial Options
Pros:
- Convenience: Ready-made systems are easy to use and require no additional setup. Just fill the reservoir, and the pot will manage the water supply.
- Consistency: Commercial self-watering pots often have built-in features like water level indicators and built-in reservoirs, providing a reliable and consistent water source.
- Variety: Available in numerous styles, sizes, and materials, catering to different plant needs and aesthetic preferences.
- Quality: Often designed with high-quality materials and precise engineering for effective water management.
Cons:
- Cost: Can be more expensive than DIY options, particularly for larger or designer models.
- Complexity: Some systems may have more parts and mechanisms, which could require maintenance or replacement parts.
- Limited Customization: Commercial options may not fit every gardening scenario or specific plant needs.
DIY Methods
Using Water Bottles with Wicks
How It Works:
- Setup: Insert a wick (e.g., cotton rope or fabric strip) into a water bottle filled with water. Place the bottle upside down in the soil of your potted plant. The wick will draw water from the bottle into the soil as needed.
- Advantages: Inexpensive and easy to create with household items. Effective for small to medium-sized pots.
- Considerations: The amount of water may need to be adjusted manually, and the wick should be regularly checked for clogs.
Bottom Storage Systems
How It Works:
- Setup: Place a pot with drainage holes inside a larger container or tray that acts as a reservoir. The water in the reservoir is absorbed through the drainage holes of the inner pot.
- Advantages: Provides a steady supply of water from the bottom, reducing the need for frequent watering. Easy to assemble and maintain.
- Considerations: Requires a suitable container or tray that fits the pot. The water level in the reservoir needs to be monitored and refilled as necessary.
Drip Bottles
How It Works:
- Setup: Use a plastic bottle with a small hole or an adjustable drip mechanism. Place the bottle in the soil or hang it above the plant, allowing water to drip slowly onto the soil.
- Advantages: Simple and low-cost. Can be adjusted to control the flow rate of water.
- Considerations: The flow rate needs to be calibrated, and the bottle should be cleaned regularly to prevent algae or mold growth.
Comparison: Detailed Comparison Between Different Self-Watering Systems
Feature | Commercial Self-Watering Pots | DIY Water Bottles with Wicks | DIY Bottom Storage Systems | DIY Drip Bottles |
Cost | Higher | Low | Low | Low |
Ease of Use | Very easy, minimal setup | Simple setup | Moderate setup | Simple setup |
Consistency | High, with built-in features | Moderate, depends on wick | High, as long as reservoir is maintained | Moderate, depends on drip mechanism |
Customizability | Limited to available designs | Highly customizable | Moderately customizable | Moderately customizable |
Maintenance | Low, but may require part replacements | Low, occasional wick cleaning | Low, periodic water refilling | Low, occasional cleaning of the bottle |
Water Delivery | Controlled and even | Capillary action from wick | Passive absorption from reservoir | Controlled drip rate |
Suitability | Suitable for various plant sizes and types | Best for small to medium pots | Suitable for various sizes | Suitable for various sizes |
Self-watering pots offer a practical solution for managing plant moisture levels with minimal effort. Commercial options provide convenience and consistency, while DIY methods offer cost-effective and customizable solutions. Understanding the pros and cons of each method allows you to select the best system for your gardening needs. Whether you opt for a ready-made system or a DIY approach, self-watering pots can help ensure your plants remain healthy and well-hydrated, making gardening more enjoyable and manageable.

Basic Introduction to Hydroponics
Hydroponics is an innovative method of growing plants without the use of soil, instead utilizing nutrient-rich water solutions to deliver essential nutrients directly to the plant roots. This method can offer numerous advantages, including faster growth rates and higher yields, making it a popular choice for both commercial and home gardening enthusiasts.
What is Hydroponics?
Definition:
- Hydroponics is a method of growing plants where soil is replaced with a nutrient solution. Plants are supported in an inert growing medium like perlite, vermiculite, or rock wool, which provides physical support but does not supply nutrients.
Advantages:
- Increased Growth Rate: Plants often grow faster in hydroponic systems because nutrients are delivered directly to the roots, and environmental factors can be controlled more precisely.
- Higher Yields: With optimal nutrient and environmental conditions, hydroponic systems can produce more significant yields compared to traditional soil-based gardening.
- Efficient Use of Resources: Hydroponic systems use less water than soil gardening because the water is recirculated, minimizing waste.
- Space Efficiency: Ideal for urban gardening or areas with poor soil quality, as hydroponics can be set up in limited spaces, such as rooftops or indoor areas.
Basic Systems
- Nutrient Film Technique (NFT)
- Description: A thin film of nutrient-rich water flows continuously over the roots of plants, which are supported in a sloped, trough-like channel.
- Advantages: Efficient use of water and nutrients, and plants have access to a constant supply of oxygen and nutrients.
- Considerations: Requires a pump to circulate the nutrient solution and careful monitoring to prevent issues with water flow and nutrient imbalance.
- Deep Water Culture (DWC)
- Description: Plants are suspended in a nutrient-rich water solution with their roots submerged. An air pump provides oxygen to the roots.
- Advantages: Simple system with excellent oxygenation for the roots. Rapid plant growth due to high nutrient availability.
- Considerations: Requires careful monitoring of oxygen levels and nutrient concentrations. Water temperature and pH levels need to be controlled.
- Wick Systems
- Description: A passive system where a wick draws nutrient solution from a reservoir up to the plant roots, which are supported in a growing medium.
- Advantages: Simple and low-cost, with minimal moving parts. Good for small-scale or beginner systems.
- Considerations: Suitable for small plants; not ideal for large or fast-growing plants. The rate of nutrient delivery depends on the wick’s efficiency.
DIY Hydroponic Systems
- DIY Nutrient Film Technique (NFT)
- Materials: PVC pipes or gutters, a water pump, a reservoir, and a growing medium (such as net pots or sponges).
- Setup: Construct a sloped channel using PVC pipes or gutters. Install the water pump to circulate the nutrient solution from the reservoir through the channel and back.
- Instructions: Place plants in the growing medium and position them in the channels. Ensure the nutrient film reaches the roots effectively.
- DIY Deep Water Culture (DWC)
- Materials: A container or bucket, an air pump and air stones, net pots, and a hydroponic nutrient solution.
- Setup: Fill the container with nutrient solution and install the air stones connected to the air pump. Position the net pots with plants in the container, ensuring the roots are submerged.
- Instructions: Monitor the water level and nutrient concentration regularly. Adjust the air pump to maintain adequate oxygen levels for the roots.
- DIY Wick System
- Materials: A container or tray, wicks (such as cotton rope), net pots, and a nutrient solution.
- Setup: Place the net pots with plants in the container or tray. Insert the wicks into the nutrient solution reservoir and position the other ends in the growing medium.
- Instructions: Ensure the wicks are in contact with both the growing medium and the nutrient solution. Regularly check the nutrient solution levels and refill as needed.
Success Stories
- Urban Hydroponic Gardens
- Example: A community garden in New York City transformed a vacant lot into a hydroponic farm, growing fresh vegetables year-round. The project highlighted hydroponics’ potential in urban agriculture, providing local produce and educational opportunities.
- Home Hydroponics
- Example: An individual in a small apartment started a hydroponic garden using a DIY NFT system, growing herbs and lettuce on their balcony. The success of this setup demonstrated that hydroponics can be effectively utilized in limited spaces.
- Commercial Hydroponics
- Example: A commercial hydroponic farm in California achieved significant success by implementing a combination of NFT and DWC systems. The farm reported increased yields and reduced water usage compared to traditional farming methods.
Hydroponics offers an exciting and efficient alternative to traditional soil-based gardening, with numerous benefits including faster plant growth, higher yields, and resource efficiency. By understanding the basic hydroponic systems and experimenting with DIY setups, you can explore the potential of soilless gardening in various settings. Whether for personal use or as part of a larger-scale operation, hydroponics provides a versatile and innovative approach to growing plants.

Selecting Plants Based on Climate and Utility
Choosing the right plants for your garden involves considering both the local climate and the intended use of the plants. Proper selection ensures optimal growth and usefulness, whether you’re growing plants for decoration, culinary purposes, or medicinal uses. This section provides guidance on selecting plants based on climate and utility, with specific recommendations for various regions.
Climate Considerations
- Understanding Local Climate
- Temperature: Plants have specific temperature requirements. Know your region’s average temperatures, frost dates, and seasonal variations.
- Rainfall: Consider the amount of precipitation your area receives. Some plants thrive in wet conditions, while others prefer dry environments.
- Sunlight: Determine the amount of sunlight your garden receives daily. Plants can be categorized as full sun (6+ hours of direct sunlight), partial shade (3-6 hours), or full shade (less than 3 hours).
- Selecting Plants for Different Climates
- Tropical Climates: Characterized by high temperatures and humidity. Choose plants that can tolerate warmth and frequent rainfall.
- Examples: Hibiscus, Bird of Paradise, Banana plants, Ginger.
- Arid Climates: Characterized by low rainfall and high temperatures. Opt for drought-tolerant and heat-resistant plants.
- Examples: Cacti, Succulents, Lavender, Rosemary.
- Temperate Climates: Experience moderate temperatures with distinct seasons. Choose plants that can handle seasonal variations.
- Examples: Tomatoes, Lettuce, Peonies, Maple trees.
- Cold Climates: Have cold winters with potential frost. Select plants that are hardy and can withstand low temperatures.
- Examples: Kale, Brussels sprouts, Snowdrops, Winterberry.
Utility-Based Selection
- Plants for Decoration
- Purpose: Enhance the visual appeal of your garden or home.
- Considerations: Choose plants based on color, texture, and form.
- Examples:
- Flowers: Roses, Marigolds, Petunias.
- Foliage: Ferns, Hostas, Coleus.
- Vines: Clematis, Bougainvillea, Ivy.
- Examples:
- Plants for Culinary Use
- Purpose: Provide fresh ingredients for cooking and flavoring.
- Considerations: Opt for herbs and vegetables that match your cooking preferences and growing conditions.
- Examples:
- Herbs: Basil, Mint, Thyme, Oregano.
- Vegetables: Bell peppers, Carrots, Spinach, Zucchini.
- Fruits: Strawberries, Blueberries, Tomatoes, Cucumbers.
- Examples:
- Plants for Medicinal Purposes
- Purpose: Offer health benefits or traditional remedies.
- Considerations: Choose plants with known medicinal properties and ensure they are suitable for your climate.
- Examples:
- Herbs: Echinacea, Lavender, Aloe Vera, Chamomile.
- Roots: Ginger, Turmeric, Ginseng.
- Teas: Peppermint, Lemon Balm, Sage.
- Examples:
Local Plant Recommendations
- Tropical Regions
- Examples:
- Hibiscus: Bright, showy flowers; thrives in warm climates.
- Bird of Paradise: Exotic appearance; prefers full sun.
- Banana Plants: Fast-growing, provides edible fruit; needs plenty of water.
- Arid Regions
- Examples:
- Cacti: Low maintenance; stores water in its tissues.
- Succulents: Drought-resistant; ideal for container gardening.
- Lavender: Aromatic herb; thrives in well-drained soil.
- Temperate Regions
- Examples:
- Tomatoes: Popular vegetable; requires full sun.
- Peonies: Beautiful flowers; tolerate cold winters.
- Maple Trees: Provides shade and beautiful fall color; suited for a variety of soils.
- Cold Regions
- Examples:
- Kale: Cold-hardy leafy green; survives frost.
- Snowdrops: Early-blooming flowers; tolerant of cold.
- Winterberry: Decorative berries; good for winter interest.
Selecting plants based on climate and utility is crucial for a successful and thriving garden. By understanding your local weather conditions and choosing plants that suit your intended use—whether for decoration, culinary purposes, or medicinal benefits—you can create a garden that is both beautiful and functional. Regional recommendations can guide you in making the best choices for your specific location, ensuring that your gardening efforts are both rewarding and sustainable.

How to Select Plants Based on Sunlight, Space, and Pot Size
Choosing plants that match the sunlight, space, and pot size of your gardening area is crucial for their health and growth. Proper selection ensures that plants thrive and contribute effectively to your garden’s aesthetic and functional goals. This section provides detailed guidance on how to select plants based on these key factors.
Sunlight Needs
- Full Sun Plants
- Definition: Plants that require at least 6 hours of direct sunlight per day.
- Examples:
- Vegetables: Tomatoes, Peppers, Cucumbers.
- Flowers: Sunflowers, Marigolds, Zinnias.
- Herbs: Basil, Rosemary, Thyme.
- Tips: Ensure these plants are placed in areas where they receive uninterrupted sunlight throughout the day. Avoid shading from structures or other plants.
- Partial Shade Plants
- Definition: Plants that thrive with 3-6 hours of direct sunlight or filtered light.
- Examples:
- Vegetables: Lettuce, Spinach, Radishes.
- Flowers: Impatiens, Begonias, Foxglove.
- Herbs: Parsley, Mint, Chives.
- Tips: These plants are ideal for areas that receive dappled sunlight or light shade. They can also thrive under the canopy of larger plants or trees.
- Full Shade Plants
- Definition: Plants that require less than 3 hours of direct sunlight per day and can grow in low light conditions.
- Examples:
- Vegetables: Kale, Mustard Greens.
- Flowers: Hostas, Astilbes, Bleeding Hearts.
- Herbs: Lemon Balm, Cilantro.
- Tips: Perfect for areas with minimal sunlight, such as north-facing walls or under dense tree cover. Ensure these plants still receive some indirect light for optimal growth.
Space Requirements
- Compact Plants for Small Spaces
- Definition: Plants that grow to a small size and are suitable for confined areas such as balconies, window boxes, or small gardens.
- Examples:
- Vegetables: Cherry tomatoes, Baby carrots, Lettuce.
- Flowers: Petunias, Pansies, Nasturtiums.
- Herbs: Basil, Chives, Thyme.
- Tips: Opt for dwarf varieties or those specifically bred for container gardening. Use vertical space by adding shelves or hanging planters.
- Larger Plants for Open Areas
- Definition: Plants that require ample space to spread out and grow, suitable for gardens with open ground or larger pots.
- Examples:
- Vegetables: Pumpkins, Corn, Squash.
- Flowers: Sunflowers, Peonies, Lilies.
- Herbs: Sage, Oregano, Tarragon.
- Tips: Plan for adequate spacing between plants to allow for their full growth. Consider using larger garden beds or pots to accommodate their size.
Pot Size
- Matching Plant Size to Pot Size
- Definition: Ensuring that the pot size is appropriate for the plant’s root system and overall growth.
- Guidelines:
- Small Pots: Best for small plants, seedlings, or herbs. Typically 4-6 inches in diameter.
- Medium Pots: Suitable for medium-sized plants or those that will remain in pots for a longer period. Typically 8-12 inches in diameter.
- Large Pots: Ideal for larger plants or those with extensive root systems. Typically 14 inches in diameter or larger.
- Tips: Avoid pots that are too small, as they can restrict root growth and water availability. Conversely, very large pots can retain excessive moisture, which may lead to root rot if not properly managed.
- Pot Size Considerations
- Drainage: Ensure pots have drainage holes to prevent waterlogging and root rot.
- Material: Choose pots made of materials that suit your climate (e.g., terracotta for hot climates as it breathes well, plastic for cooler climates for insulation).
- Mobility: Consider using pots with saucers or those that are easy to move if you need to relocate your plants.
Shade-Tolerant Plants
- Low-Light Options
- Definition: Plants that can thrive in environments with minimal natural light.
- Examples:
- Indoor Plants: Snake Plant, ZZ Plant, Pothos.
- Shade Flowers: Bleeding Heart, Japanese Forest Grass.
- Shade Herbs: Mint, Chives.
- Tips: Use these plants to brighten up darker areas of your home or garden. They can tolerate lower light conditions and still perform well.
Selecting plants based on sunlight, space, and pot size ensures that they will grow well and enhance your garden’s beauty and functionality. By understanding the specific needs of your plants and matching them to your gardening conditions, you can create a thriving and harmonious garden environment. Proper planning and consideration of these factors will help you make informed choices and enjoy a successful gardening experience.

Creating Fertilizers Using Kitchen Green Waste
Transforming kitchen green waste into useful fertilizers not only helps reduce household waste but also enhances your garden’s health and productivity. This section explores various methods for creating fertilizers from kitchen scraps, including composting, bio gas, fertilizer tea, bio digestors, and vermicomposting.
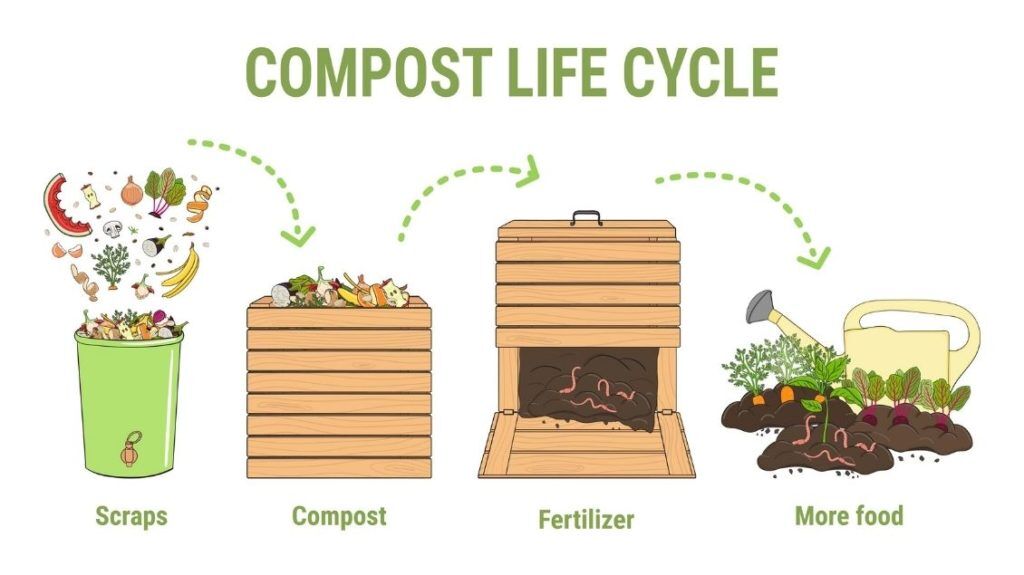
Composting: Methods and Benefits
- Composting Methods
- Traditional Composting: This involves creating a compost pile or bin where kitchen scraps, yard waste, and other organic materials decompose over time. Key components include:
- Green Materials: Nitrogen-rich items like fruit and vegetable scraps, coffee grounds, and grass clippings.
- Brown Materials: Carbon-rich items like dried leaves, cardboard, and paper.
- Turning: Regularly turning the compost to aerate it and speed up decomposition.
- Moisture: Maintaining the right moisture level—about as damp as a wrung-out sponge.
- Tumbler Composting: Composting in a sealed, rotating drum. Benefits include:
- Faster Decomposition: Frequent turning speeds up the composting process.
- Less Odor: Enclosed system reduces odors and pests.
- Bokashi Composting: A fermentation-based method using bran inoculated with microorganisms. Benefits include:
- Odor Reduction: Fermentation produces less odor compared to traditional composting.
- Speed: Faster decomposition of food waste, including meat and dairy.
- Benefits of Composting
- Nutrient-Rich Soil: Compost provides essential nutrients and improves soil structure.
- Waste Reduction: Reduces the amount of kitchen waste sent to landfills.
- Improved Plant Growth: Enhances soil fertility and water retention, benefiting plant health.
Bio Gas and Fertilizer Tea: Homemade Solutions
- Bio Gas Production
- Definition: Bio gas is produced through anaerobic digestion of organic materials, such as kitchen scraps. It can be used for cooking or as a fuel source.
- Process:
- Feedstock: Kitchen scraps, manure, and other organic waste are added to a sealed digester.
- Anaerobic Digestion: Microorganisms break down the waste in the absence of oxygen, producing bio gas (primarily methane) and digestate.
- Collection: The gas is collected and can be used for energy, while the digestate can be used as a fertilizer.
- Fertilizer Tea
- Definition: A liquid fertilizer made by steeping compost or other organic materials in water.
- Method:
- Ingredients: Compost, manure, or other organic matter.
- Brewing: Steep the ingredients in water for several days, stirring occasionally.
- Application: Strain the liquid and use it as a nutrient-rich feed for plants.
- Benefits
- Sustainable Energy: Bio gas provides a renewable energy source.
- Nutrient Boost: Fertilizer tea delivers readily available nutrients to plants.
Bio Digestors: Small-Scale Systems for Home Use
- What is a Bio Digestor?
- Definition: A compact system designed for converting organic waste into biogas and compost through anaerobic digestion.
- Types:
- Batch Digestors: Operated in batches; waste is added, processed, and then emptied periodically.
- Continuous Digestors: Organic waste is continuously added and processed, providing a steady output of biogas and compost.
- Benefits of Bio Digestors
- Efficient Waste Management: Handles kitchen scraps and organic waste effectively.
- Produces Biogas: Provides a renewable energy source for cooking or heating.
- Generates Compost: Produces nutrient-rich compost for gardening.
- Setting Up a Bio Digestor
- Choosing a Model: Select a digestor based on your waste production and space.
- Installation: Follow the manufacturer’s instructions for setting up and operating the system.
- Maintenance: Regularly monitor and maintain the digestor to ensure optimal performance.
Vermicomposting: Using Worms to Create High-Quality Compost
- What is Vermicomposting?
- Definition: A composting method that uses earthworms to break down organic waste into nutrient-rich compost.
- Process:
- Worm Bin: Set up a bin with bedding materials (e.g., shredded newspaper, cardboard) and add red wigglers (Eisenia fetida) or other composting worms.
- Feeding: Add kitchen scraps and other organic materials regularly.
- Harvesting: Worms produce compost, known as vermicompost, which can be harvested and used as a fertilizer.
- Benefits of Vermicomposting
- High-Quality Compost: Vermicompost is rich in nutrients and beneficial microorganisms.
- Waste Reduction: Effectively recycles kitchen scraps and paper products.
- Odor Control: Produces minimal odor when properly maintained.
- Getting Started
- Setting Up: Choose a suitable bin and bedding material, and introduce worms.
- Feeding and Care: Add appropriate food scraps and monitor moisture levels.
- Harvesting: Separate worms from the compost and use the finished vermicompost in your garden.
Creating fertilizers from kitchen green waste is a sustainable and effective way to enhance garden health while reducing waste. Composting, bio gas production, fertilizer tea, bio digestors, and vermicomposting each offer unique benefits and methods for turning organic materials into valuable garden resources. By adopting these practices, you can contribute to a healthier environment and enjoy a more productive and eco-friendly garden.
Starting the Fertilizer Cycle
Starting your own fertilizer cycle using kitchen waste and other organic materials is a rewarding way to create nutrient-rich compost for your garden. This section outlines the initial materials needed, the process for beginning and maintaining a healthy compost cycle, and tips for effective composting.
Initial Materials
- Banana Peels
- Benefits: Rich in potassium and phosphorus, banana peels enhance plant growth, improve root development, and aid in flowering and fruiting.
- Preparation: Chop or shred peels to speed up decomposition and mix them into your compost pile or bin.
- Cow Dung
- Benefits: A great source of nitrogen, cow dung helps balance the carbon-to-nitrogen ratio in compost. It also adds beneficial microbes that aid in decomposition.
- Preparation: Use well-aged cow dung to avoid introducing pathogens. Mix it thoroughly with other compost materials.
- Charcoal
- Benefits: Charcoal (not the briquettes with additives, but natural charcoal) improves soil aeration and water retention. It also helps in controlling odor and preventing pests.
- Preparation: Crush charcoal into smaller pieces before adding it to your compost. Avoid using charcoal from treated or painted wood.
- Other Materials
- Green Waste: Fruit and vegetable scraps, coffee grounds, and grass clippings provide essential nitrogen.
- Brown Waste: Dried leaves, cardboard, and paper offer carbon, balancing the compost mixture.
- Optional Additives: Eggshells for calcium, seaweed for micronutrients, and shredded newspaper for additional carbon.
Process: Steps to Start and Maintain a Healthy Compost
- Choosing a Composting Method
- Traditional Pile or Bin: Create a compost pile in your garden or use a bin. Ensure proper aeration by turning the pile regularly.
- Tumbler: A rotating compost tumbler can speed up the composting process and is convenient for small spaces.
- Bokashi Bin: Use a fermentation bin for faster composting of kitchen scraps, including meat and dairy.
- Setting Up Your Compost
- Location: Choose a well-drained, shaded spot for your compost pile or bin. This helps in managing moisture and temperature.
- Layering: Start with a base of coarse materials like twigs or straw for drainage. Alternate layers of green and brown waste, adding materials like banana peels, cow dung, and charcoal as you go.
- Moisture: Keep the compost moist but not soggy. The ideal moisture level is similar to a wrung-out sponge.
- Maintaining the Compost
- Aeration: Turn the compost regularly with a pitchfork or compost aerator to introduce oxygen, which speeds up decomposition and prevents odors.
- Temperature: Monitor the compost temperature. A well-maintained compost should reach between 130°F to 160°F (55°C to 70°C). This heat helps kill pathogens and weed seeds.
- Balancing: Maintain the carbon-to-nitrogen ratio (approximately 30:1). Adjust by adding more brown materials (carbon) or green materials (nitrogen) as needed.
- Pest Control: Avoid adding meat, dairy, or oily foods to prevent attracting pests. Use a compost bin with a lid to keep pests away if necessary.
- Harvesting the Compost
- Timing: Compost is ready when it turns dark, crumbly, and earthy-smelling. The process can take from a few months to a year, depending on conditions and materials used.
- Sifting: Remove large, undecomposed pieces and use the finished compost to enrich garden soil, as a mulch, or for potting mixes.
- Troubleshooting
- Odor: If the compost smells unpleasant, it may be too wet or lacking in aeration. Add more brown materials and turn the pile more frequently.
- Slow Decomposition: If the compost is breaking down slowly, it might need more nitrogen-rich materials or more frequent turning.
- Too Dry: If the compost is too dry, add water to reach the ideal moisture level and mix it thoroughly.
Starting and maintaining a healthy compost cycle involves using a combination of organic materials like banana peels, cow dung, and charcoal, and following the right processes to ensure effective decomposition. By setting up your compost correctly and managing it properly, you can create rich, valuable fertilizer that benefits your garden while reducing waste. Engaging in this sustainable practice enhances soil health, supports plant growth, and contributes to a more eco-friendly lifestyle.
Root Enhancers
Root enhancers are crucial for promoting strong, healthy root systems in plants. They can be natural, homemade solutions or commercial products. This section explores natural root enhancers like honey and banana, compares them with commercial products, and offers guidance on their use.
Natural Options for Root Growth
- Honey
- Benefits: Honey acts as a natural rooting hormone due to its antimicrobial properties and natural sugars, which help stimulate root growth and protect against diseases.
- Application:
- Rooting Hormone: Mix a teaspoon of honey with a cup of water. Dip the cut end of plant cuttings into the honey solution before planting.
- Soil Conditioner: Mix honey with water and apply it to the soil around plant roots to boost growth and enhance nutrient uptake.
- How It Works: Honey promotes root development by providing a nutrient-rich environment and inhibiting fungal infections.
- Banana
- Benefits: Bananas are rich in potassium and phosphorus, essential nutrients for root development. They also contain natural growth hormones that can enhance root growth.
- Application:
- Banana Peel Tea: Soak banana peels in water for a few days to create a nutrient-rich tea. Strain and use the tea to water plants.
- Banana Peel Compost: Chop banana peels and add them to compost piles. The decomposing peels contribute potassium and phosphorus to the compost.
- How It Works: The potassium and phosphorus from bananas aid in root growth and overall plant health. The natural growth hormones in bananas also support root development.
Commercial Root Enhancers
- Types of Commercial Products
- Rooting Hormones: These products typically contain synthetic or natural hormones (e.g., auxins) that stimulate root development in cuttings. Common forms include powders, gels, and liquids.
- Powder: Applied directly to the cutting before planting. Often contains rooting hormones like IBA (indolebutyric acid).
- Gel: Provides a sticky application that adheres to the cutting and promotes faster rooting.
- Liquid: Easier to mix with water for soaking cuttings or watering plants.
- Nutrient-Rich Fertilizers: Specialized fertilizers formulated with high levels of phosphorus and potassium to support root growth and overall plant health.
- Biostimulants: Products that include natural extracts or microorganisms designed to enhance root growth and soil health.
- Comparison with Natural Options
- Effectiveness:
- Natural Options: Honey and banana peels can be effective, though typically on a smaller scale or for home gardening. They are best for enhancing soil conditions and supporting root growth naturally.
- Commercial Products: Often provide faster and more consistent results due to concentrated active ingredients and proven formulations. They are ideal for larger-scale gardening or when specific results are needed.
- Cost:
- Natural Options: Generally inexpensive as they use readily available kitchen waste. They also reduce the need for purchased chemicals and fertilizers.
- Commercial Products: Can be more expensive but are convenient and designed for specific gardening needs.
- Safety and Environmental Impact:
- Natural Options: Safe for the environment and avoid introducing synthetic chemicals into the garden. They also recycle kitchen waste, making them eco-friendly.
- Commercial Products: Some may contain synthetic chemicals that can impact the environment. It’s important to choose products that are safe and environmentally responsible.
How to Choose the Right Root Enhancer
- Consider Your Needs: For small-scale or organic gardening, natural options like honey and banana peels are practical and cost-effective. For more controlled and faster results, commercial products may be preferable.
- Evaluate Plant Type: Different plants may respond better to specific root enhancers. Research plant-specific needs or consult with gardening experts for recommendations.
- Environmental Impact: Opt for products and methods that align with your environmental values, such as natural enhancers or eco-friendly commercial options.
Root enhancers play a crucial role in promoting healthy root systems and supporting plant growth. Natural options like honey and banana peels offer cost-effective and eco-friendly solutions, while commercial products provide more immediate and targeted results. Understanding the benefits and applications of both types of enhancers allows gardeners to choose the best approach for their needs, ensuring strong, vibrant plants and a thriving garden.
How to Propagate Common Plants
Plant propagation is an essential gardening skill that allows you to create new plants from existing ones. There are several methods of propagation, each suited to different types of plants and gardening goals. This section covers the primary propagation techniques, including from cuttings, roots, seeds, air layering, and tissue culture.
Propagation from Cuttings
Techniques for Different Plants:
- Herbaceous Cuttings:
- Examples: Basil, mint, and coleus.
- Method:
- Select healthy, non-flowering stems about 4-6 inches long.
- Remove lower leaves, leaving only the top 2-3 leaves.
- Dip the cut end in rooting hormone (optional) and plant in a pot with moist potting mix.
- Keep the cutting in a warm, humid environment until roots develop, usually within 2-4 weeks.
- Woody Cuttings:
- Examples: Lavender, rosemary, and hydrangea.
- Method:
- Use semi-hardwood or hardwood stems, depending on the plant.
- Cut 6-8 inch segments, ensuring they have at least 3-4 leaf nodes.
- Remove lower leaves and dip in rooting hormone.
- Plant in a well-draining mix and water lightly.
- Cover with a plastic bag or dome to maintain humidity and place in indirect light. Roots typically form in 6-8 weeks.
- Succulents:
- Examples: Aloe vera, jade plant, and echeveria.
- Method:
- Gently twist or cut a healthy leaf or stem from the plant.
- Allow the cutting to dry and callous over for a few days.
- Place the dried cutting on a well-draining soil mix and water sparingly.
- New roots and growth will emerge over several weeks.
- Propagation from Roots
Dividing Plants to Create New Growth:
- When to Divide:
- Ideal for plants that form clumps or have multiple stems, such as hostas, daylilies, and ornamental grasses.
- Divide in early spring or fall when plants are dormant or just starting new growth.
- Method:
- Remove the plant from its pot or garden bed and gently separate the root ball into smaller sections using a clean knife or garden shears.
- Ensure each section has roots and shoots or buds.
- Replant each division in fresh soil or a pot with adequate drainage.
- Water thoroughly and provide appropriate care to encourage new growth.
- Propagation from Seeds
Seed Selection and Germination Tips:
- Choosing Seeds:
- Select seeds from reputable sources for better germination rates and plant health.
- Consider the plant’s growing requirements, such as light, temperature, and soil conditions.
- Germination Tips:
- Preparation: Some seeds may need pre-treatment, such as scarification (scratching the seed coat) or stratification (cold treatment).
- Sowing: Plant seeds in a seed-starting mix or soil-less medium, following the depth and spacing instructions on the seed packet.
- Moisture and Temperature: Keep the soil moist but not waterlogged. Most seeds require warm temperatures for germination.
- Light: Provide adequate light, either through natural sunlight or grow lights, depending on the plant species.
- Transplanting: Once seedlings have developed a few sets of true leaves, they can be transplanted into larger pots or directly into the garden.
Air Layering
Advanced Propagation Technique:
- Definition: Air layering involves inducing roots to form on a stem while it is still attached to the parent plant.
- Method:
- Select a healthy, mature branch and make a small, shallow incision or remove a ring of bark.
- Apply rooting hormone to the exposed area.
- Wrap the area with a moist sphagnum moss or peat moss, securing it with plastic wrap or aluminum foil.
- Keep the moss consistently moist and wait for roots to form, usually within 2-3 months.
- Once sufficient roots have developed, cut the branch below the new root ball and transplant it to a new pot or location.
Tissue Culture
Brief Introduction to This Method:
- Definition: Tissue culture is a laboratory technique used to propagate plants by cultivating cells or tissues in a sterile environment.
- Process:
- Explants: Small pieces of plant tissue (explants) are taken from the parent plant and sterilized.
- Culture Medium: The explants are placed in a nutrient-rich culture medium that supports cell growth and development.
- Regeneration: Cells develop into shoots and roots, forming new plants.
- Acclimatization: The young plants are gradually acclimatized to external conditions before being transferred to soil or pots.
- Applications: Tissue culture is commonly used for producing large numbers of identical plants, conserving endangered species, and developing disease-resistant varieties.
Understanding various propagation methods, from cuttings and roots to seeds and advanced techniques like air layering and tissue culture, enables gardeners to multiply their plants effectively. Each method has its benefits and applications, suited to different types of plants and gardening needs. By mastering these techniques, gardeners can expand their collections, enhance their gardens, and contribute to sustainable plant growth.

Grafting Basics
Grafting is a horticultural technique used to join parts from two different plants so that they grow as one. This method combines the desirable traits of both plants, such as improved yield, disease resistance, and better adaptability. This section covers the essentials of grafting, including what it is, basic techniques, and necessary tools.
What is Grafting?
Definition and Purpose:
- Grafting: The process of joining the tissue of one plant (the scion) with the tissue of another plant (the rootstock) so they grow together as a single plant.
- Purpose:
- Combining Traits: Grafting allows gardeners to combine the strengths of two plants. For example, a disease-resistant rootstock can be paired with a high-yielding scion.
- Repairing Damage: It can be used to repair damaged plants or replace parts of a plant.
- Propagating Cultivars: Grafting is often used to propagate plants that do not grow true from seeds, such as fruit trees and certain ornamentals.
Basic Techniques
**1. Cleft Grafting:
- When to Use: Ideal for grafting large scions onto smaller rootstocks, often used with trees and shrubs.
- Method:
- Prepare the Rootstock: Cut the rootstock down to a suitable height and make a vertical split down the center.
- Prepare the Scion: Cut the scion to fit snugly into the split. It should have at least one bud.
- Insert the Scion: Place the scion into the split, ensuring that the cambium layers (the green layer under the bark) of both the scion and rootstock align.
- Secure the Graft: Wrap the graft with grafting tape or parafilm to hold it in place and protect it from disease.
**2. Whip and Tongue Grafting:
- When to Use: Commonly used for grafting small to medium-sized plants, including fruit trees.
- Method:
- Prepare the Scion and Rootstock: Make matching slanted cuts on both the scion and rootstock, creating a “tongue” or flap.
- Join the Scion and Rootstock: Fit the cuts together, ensuring the cambium layers are aligned.
- Secure the Graft: Bind with grafting tape or rubber bands and cover with grafting wax to protect from moisture and disease.
**3. Budding:
- When to Use: Suitable for small plants and shrubs; used to insert a single bud from the scion into the rootstock.
- Method:
- Prepare the Rootstock: Make a T-shaped incision in the bark of the rootstock.
- Prepare the Bud: Cut a bud from the scion along with a small piece of bark.
- Insert the Bud: Place the bud into the T-shaped incision and secure it with a grafting tape or bandage.
- Cover and Protect: Seal the graft with grafting wax or tape to protect against pests and disease.
**4. Approach Grafting:
- When to Use: Useful for grafting plants that are difficult to graft with other methods. It can be performed while both plants are still growing.
- Method:
- Prepare the Plants: Make matching cuts on both the scion and rootstock so they can be joined.
- Join the Scion and Rootstock: Attach the scion to the rootstock while both are still on their respective plants.
- Secure the Graft: Use grafting tape or a similar material to keep the union stable.
Grafting Tools
**1. Grafting Knife:
- Description: A sharp, curved knife used for making precise cuts on the scion and rootstock.
- Features: Look for a knife with a comfortable grip and a sharp, durable blade.
**2. Pruning Shears:
- Description: Used to trim branches and cut scions or rootstocks to the desired length.
- Features: Ensure they are sharp and suitable for the thickness of branches you are working with.
**3. Grafting Tape:
- Description: Flexible tape used to secure the graft union and protect it from disease.
- Features: Choose tape that adheres well and is durable enough to withstand environmental conditions.
**4. Grafting Wax or Sealant:
- Description: A protective coating applied to the graft site to prevent moisture loss and disease infection.
- Features: Select a high-quality wax or sealant that is suitable for the type of graft you are performing.
**5. Rubber Bands or Clips:
- Description: Used to hold the graft in place and secure the union.
- Features: Choose bands or clips that are durable and will not constrict the growth of the plant.
Grafting is a valuable technique in horticulture for combining the desirable traits of two plants. Understanding the basic methods—cleft grafting, whip and tongue grafting, budding, and approach grafting—along with the essential tools, enables gardeners to enhance plant quality and propagate desired varieties. By mastering these techniques, you can improve plant resilience, increase yields, and effectively manage your garden or orchard.
Plants with Extreme Indian Significance
India’s rich cultural and medicinal heritage is deeply intertwined with its flora. Many plants hold a special place in Indian tradition, religion, and medicine. This section explores plants of profound significance in India, including Tulsi (Holy Basil), Neem, Turmeric, and other Ayurvedic plants, highlighting their cultural and medicinal importance.
Tulsi (Holy Basil)
Cultural Significance:
- Religious Importance: Tulsi, or Holy Basil (Ocimum sanctum), is revered in Hinduism as a sacred plant associated with the goddess Tulsi, considered an embodiment of purity and devotion. It is often grown near homes and temples.
- Ritual Use: Tulsi leaves are used in daily worship, religious ceremonies, and festivals. The plant is believed to purify the environment and bring spiritual benefits.
Medicinal Importance:
- Health Benefits: Tulsi is renowned for its wide range of medicinal properties. It is used to:
- Boost Immunity: Tulsi enhances the immune system, helping the body fight infections and diseases.
- Reduce Stress: It has adaptogenic properties, aiding in the reduction of stress and anxiety.
- Improve Respiratory Health: Tulsi is often used to treat respiratory issues such as asthma and bronchitis.
- Support Digestive Health: It aids digestion and helps manage gastrointestinal disorders.
Uses:
- Tea: Tulsi leaves are commonly brewed into a herbal tea known for its soothing properties.
- Extracts: Available in various forms, including capsules, oils, and tinctures, for medicinal use.
Neem (Azadirachta indica)
Cultural Significance:
- Traditional Uses: Neem is known as the “village pharmacy” due to its extensive use in traditional medicine. It is integral to Ayurvedic practices and is used in religious rituals for purification.
- Symbolism: Neem symbolizes health and wellness in Indian culture, often used in wedding rituals and festivals for its protective and cleansing properties.
Medicinal Importance:
- Health Benefits: Neem is valued for its antimicrobial, anti-inflammatory, and detoxifying properties. It is used to:
- Combat Skin Conditions: Neem is effective against acne, eczema, and other skin ailments.
- Improve Oral Health: Neem’s antibacterial properties make it useful in oral hygiene, preventing gum disease and tooth decay.
- Support Liver Health: It aids in liver detoxification and improves liver function.
Uses:
- Oil: Neem oil is used for skin care, hair care, and as a natural pesticide.
- Powder: Neem powder is utilized in Ayurvedic medicine and herbal remedies.
Turmeric (Curcuma longa)
Cultural Significance:
- Religious and Ritual Use: Turmeric, known as “Haldi” in India, is used in various Hindu rituals, including weddings and religious ceremonies, for its auspicious and purifying properties.
- Culinary Use: It is a staple in Indian cuisine, valued for its color, flavor, and health benefits.
Medicinal Importance:
- Health Benefits: Turmeric is renowned for its anti-inflammatory and antioxidant properties. It is used to:
- Reduce Inflammation: Curcumin, the active compound in turmeric, helps manage inflammation and pain.
- Improve Joint Health: It is beneficial for conditions such as arthritis and joint pain.
- Support Digestive Health: Turmeric aids digestion and alleviates symptoms of gastrointestinal disorders.
Uses:
- Spice: Turmeric is used as a spice in cooking, particularly in curries and rice dishes.
- Supplements: Available in capsules and extracts for medicinal purposes.
Other Ayurvedic Plants
**1. Ashwagandha (Withania somnifera):
- Significance: Known as “Indian ginseng,” Ashwagandha is used in Ayurveda to enhance stamina, reduce stress, and improve cognitive function.
- Uses: It is consumed as a powder, capsule, or tincture.
**2. Amla (Phyllanthus emblica):
- Significance: Amla, or Indian gooseberry, is a key ingredient in Ayurvedic medicine for its rejuvenating and antioxidant properties.
- Uses: It is used in powdered form, as a juice, or in supplements for immune support and skin health.
**3. Brahmi (Bacopa monnieri):
- Significance: Brahmi is revered for its cognitive-enhancing and stress-relieving properties.
- Uses: It is used as a supplement or in herbal formulations to improve memory and mental clarity.
**4. Gotu Kola (Centella asiatica):
- Significance: Known for its wound-healing and skin-rejuvenating properties, Gotu Kola is used in traditional medicine for its beneficial effects on skin health and cognitive function.
- Uses: It is available in extracts, teas, and topical applications.
Plants like Tulsi, Neem, and Turmeric, along with other Ayurvedic herbs, are deeply ingrained in Indian culture and medicine. Their significance extends beyond their practical uses, symbolizing spiritual and cultural values. By incorporating these plants into daily life, individuals can benefit from their rich heritage of healing and wellness, while also connecting with the traditions and practices that have shaped Indian botanical knowledge for centuries.

Handling Extended Holidays with Personal Gardens
Maintaining a personal garden while you’re away for an extended holiday can be a challenge. To ensure that your plants stay healthy and continue to thrive in your absence, consider implementing these strategies:
Automatic Watering Systems
- Timers:
- Functionality: Timers can be programmed to turn your watering system on and off at specific intervals. They are ideal for regular and predictable watering schedules.
- Types: Digital timers offer precise control and easy programming, while mechanical timers are simpler and often more affordable.
- Benefits: Timers ensure that your plants receive consistent watering even when you’re not around, reducing the risk of over or under-watering.
- Drip Irrigation Systems:
- Components: A drip irrigation system consists of a network of hoses or tubes that deliver water directly to the plant roots. It includes emitters, filters, and connectors.
- Advantages: Drip irrigation is water-efficient and minimizes water wastage. It can be adjusted to provide varying amounts of water to different plants based on their needs.
- Setup: Systems can be installed with a timer to automate watering schedules. Ensure that the system is tested and adjusted before you leave.
Community Help
- Neighbors or Friends:
- Arrangements: Coordinate with neighbors, friends, or family members who can visit your garden and provide care. Share detailed instructions about watering, plant care, and any special needs.
- Benefits: Having someone you trust take care of your garden can provide peace of mind. It’s also a good opportunity to reciprocate and offer to care for their gardens in return.
- Plant Care Instructions:
- Documentation: Create a care guide outlining watering schedules, plant specific needs, and any pests or diseases to watch for. Include photos for visual reference.
- Communication: Keep in touch with your caretaker via phone or messaging to address any issues or questions that may arise.
Preparing Plants
- Pre-Holiday Preparation:
- Watering: Water your plants thoroughly before leaving. This helps them stay hydrated and reduces the need for frequent watering.
- Mulching: Apply mulch around the base of plants to retain moisture and regulate soil temperature.
- Pruning: Trim any dead or diseased foliage to promote healthy growth and reduce maintenance needs.
- Protective Measures:
- Shade Protection: Use shade cloths or provide temporary shelter to protect plants from extreme temperatures and sunlight.
- Pest Control: Apply natural pest repellents or barriers to prevent infestations during your absence.
Plant Sitters
- Services and Platforms:
- Professional Plant Sitters: Look for specialized services that offer plant care while you’re away. These professionals are experienced in handling various types of plants and garden maintenance.
- Online Platforms: Websites and apps connect homeowners with plant sitters. You can review profiles, read reviews, and choose someone who matches your needs.
- Cost: Plant sitting services typically charge based on the number of plants and the duration of care. Discuss pricing and services before committing.
- Choosing a Plant Sitter:
- References: Check for references and reviews to ensure reliability and trustworthiness.
- Instructions: Provide clear and detailed instructions about plant care, including watering schedules, fertilizer application, and any special requirements.
Handling extended holidays with a personal garden requires careful planning and preparation. By setting up automatic watering systems, arranging community help, preparing your plants, and considering plant sitting services, you can ensure that your garden remains healthy and vibrant while you’re away. These strategies help maintain the beauty and productivity of your garden, allowing you to enjoy your holiday with peace of mind.

Conclusion
Gardening offers a world of benefits and opportunities, from enhancing your well-being to connecting with nature and fostering a sustainable lifestyle. As you consider embarking on your gardening journey, remember that it’s not only about cultivating plants but also about nurturing your own growth and happiness. Here’s a final encouragement to get started, a summary of key points, and additional resources to support your gardening adventure.
Encouragement
Gardening is a rewarding and transformative experience that can enrich your life in numerous ways. Whether you’re starting with a small potted plant or envisioning a full backyard garden, the process of growing and caring for plants can provide a profound sense of accomplishment and joy. Embrace the opportunity to connect with nature, relieve stress, and enjoy the tangible rewards of your efforts. Take the first step today—your future self will thank you for it.
Summary
Benefits of Gardening:
- Relaxation and Mental Health: Gardening helps reduce stress, improve mood, and foster mindfulness.
- Physical Health: Engaging in gardening provides light exercise and exposure to fresh air.
- Sustainability: Growing your own food contributes to a greener planet by reducing your carbon footprint.
- Educational Value: Learn about plant biology, ecosystems, and sustainable practices.
Practical Steps to Begin:
- Choose the Right Garden Type: Consider options like rooftop, balcony, potted, or kitchen gardens based on your space and interests.
- Prepare Your Pots: Select appropriate pots and substrates, and consider DIY self-watering systems.
- Understand Substrates: Use coco peat, soil, sand, charcoal, or hydrogel for effective growing mediums.
- Explore Hydroponics: Try simple hydroponic systems to grow plants without soil.
- Select Plants Wisely: Choose plants based on climate, sunlight, space, and utility.
- Create Fertilizers: Utilize kitchen waste to make compost, bio gas, and fertilizer tea.
- Propagate and Graft: Learn propagation techniques and grafting basics to expand your garden.
- Handle Holidays: Implement automatic watering systems or arrange for plant sitters to care for your garden while you’re away.
As you embark on your gardening journey, consider supporting organizations that promote environmental sustainability and community well-being. The MEDA Foundation is dedicated to empowering communities through various initiatives. Your support can make a significant difference in advancing these important causes. Explore ways to contribute and get involved with the MEDA Foundation to help foster a greener, more sustainable future.
Further Reading
To deepen your knowledge and skills in gardening, consider exploring these resources:
- Books:
- “The Complete Gardener” by Monty Don – A comprehensive guide to gardening practices and techniques.
- “All New Square Foot Gardening” by Mel Bartholomew – Practical advice on maximizing garden space and yields.
- Websites:
- The Royal Horticultural Society (RHS) – rhs.org.uk – Offers tips, advice, and plant information.
- Gardening Know How – gardeningknowhow.com – Provides practical gardening tips and solutions.
- Resources:
- Local Extension Services – Contact your local agricultural extension office for region-specific advice and resources.
- Online Courses – Platforms like Coursera and Udemy offer gardening courses for beginners.
Gardening Communities
Engage with gardening communities to gain support, share experiences, and seek advice.
Final Thoughts
Gardening is a fulfilling and accessible hobby that offers numerous benefits for physical health, mental well-being, and environmental sustainability. By taking the steps outlined in this article, you can embark on a rewarding gardening journey that enhances your life and contributes to a greener world. Happy gardening!
